Honza Pokorný
A personal blog
Making the Ergodox work
In the keyboard ethusiast community, the Ergodox is a bit controversial. It’s one of the few keyboards that are available pre-built, and with a warranty. If you want one, you don’t need to find a PCB printer, and solder your own switches, and controllers. But, many have tried it, and abandonded it. I think it comes down to a few things, and I’d like to discuss one of those issues today: the awkward thumb cluster position.
Each keyboard half is shaped like a mitten, and at first glance it looks compelling. But in practice, your hand is forced into an unnatural, claw-like grip of the keyboard. This was much improved in the follow up design called the Moonlander with its folding thumb cluster.
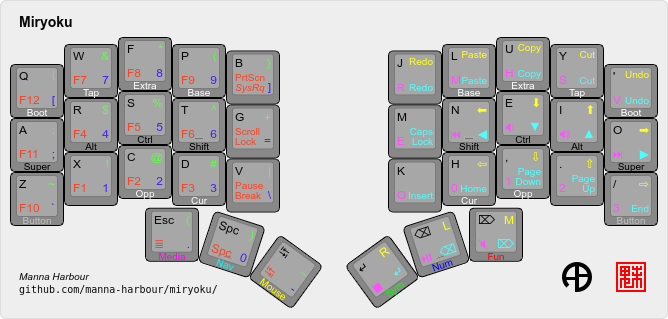
The solution to this problem is brilliant, and I wish I could take credit for it. It comes from the lovely Miryoku project. Miryoku is a 36-key keyboard layout for many different keyboards, and it has a lot of configuration options. Since the Ergodox has a lot more than 36 keys, we are free to move around the keyboard, and still use Miryoku.
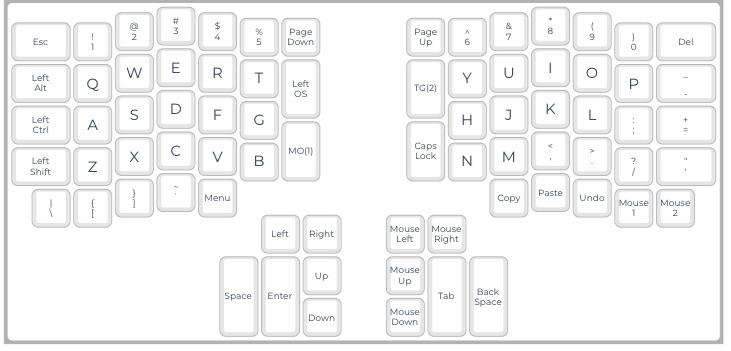
The default Ergodox looks like this:
The default Miryoku looks like this:
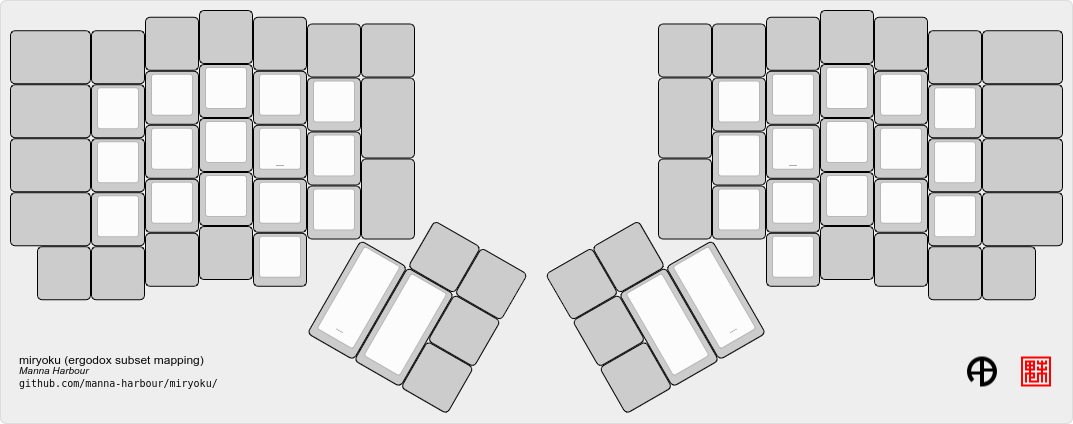
If we overlay Miryoku on the Ergodox, the most straight-forward way is something like this:
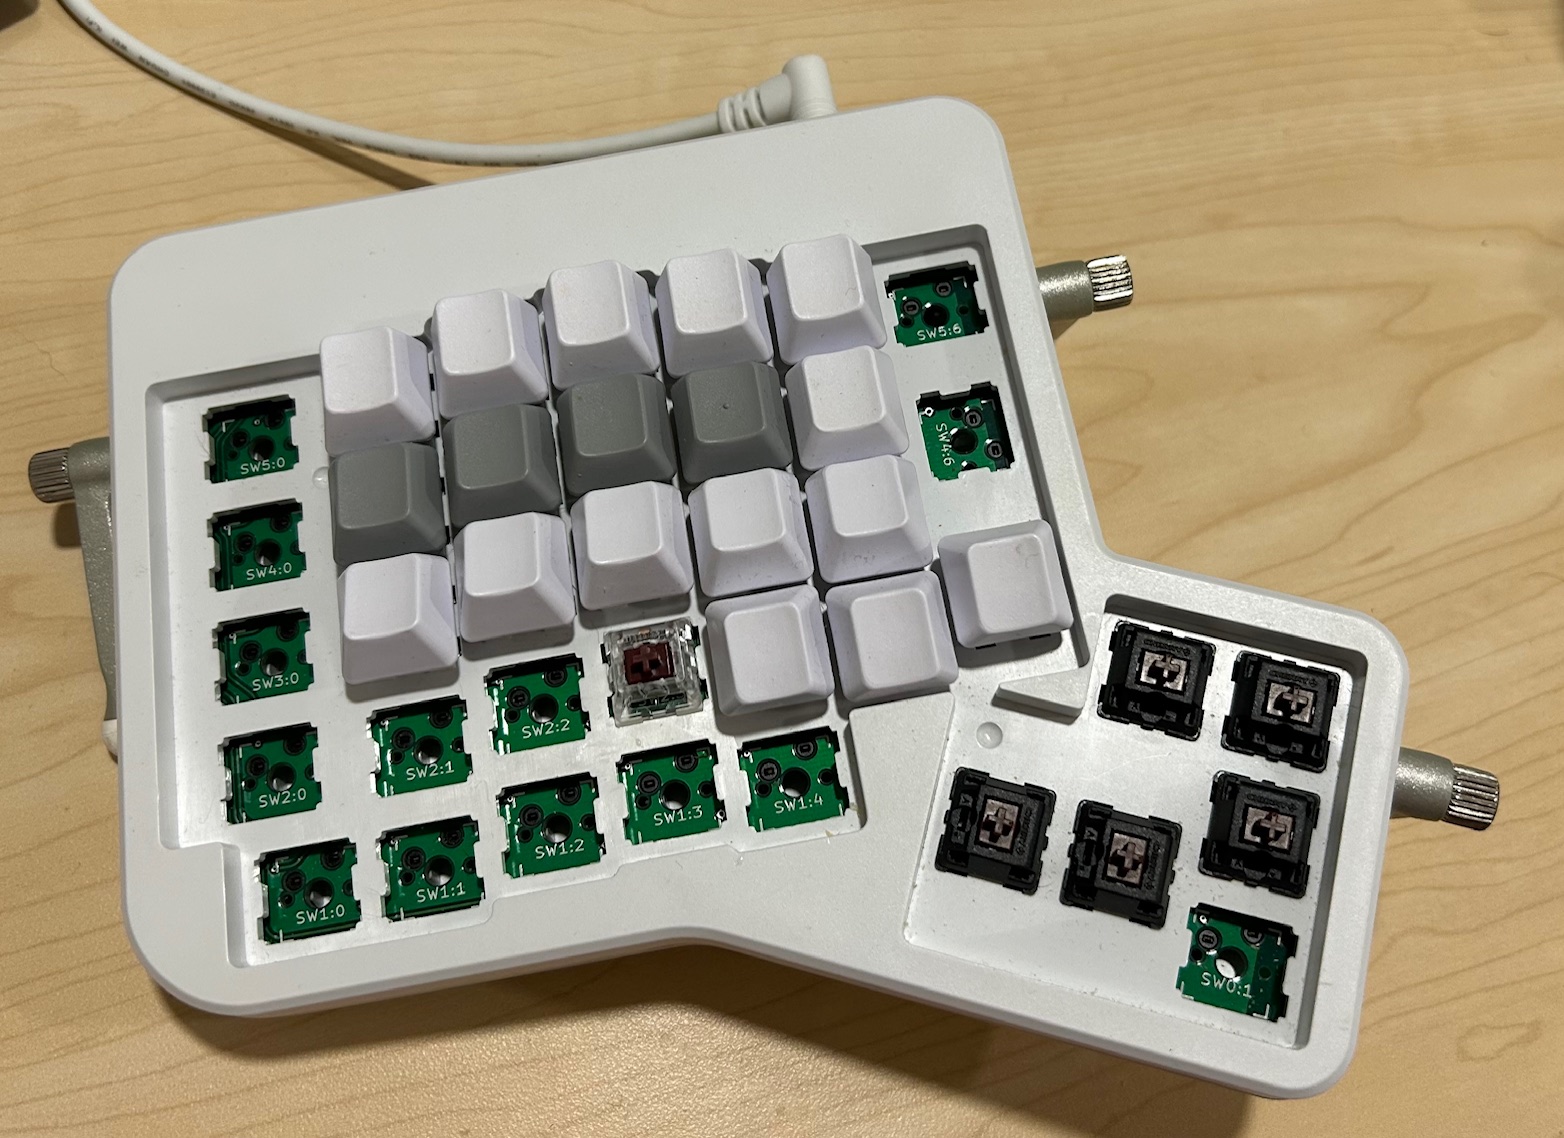
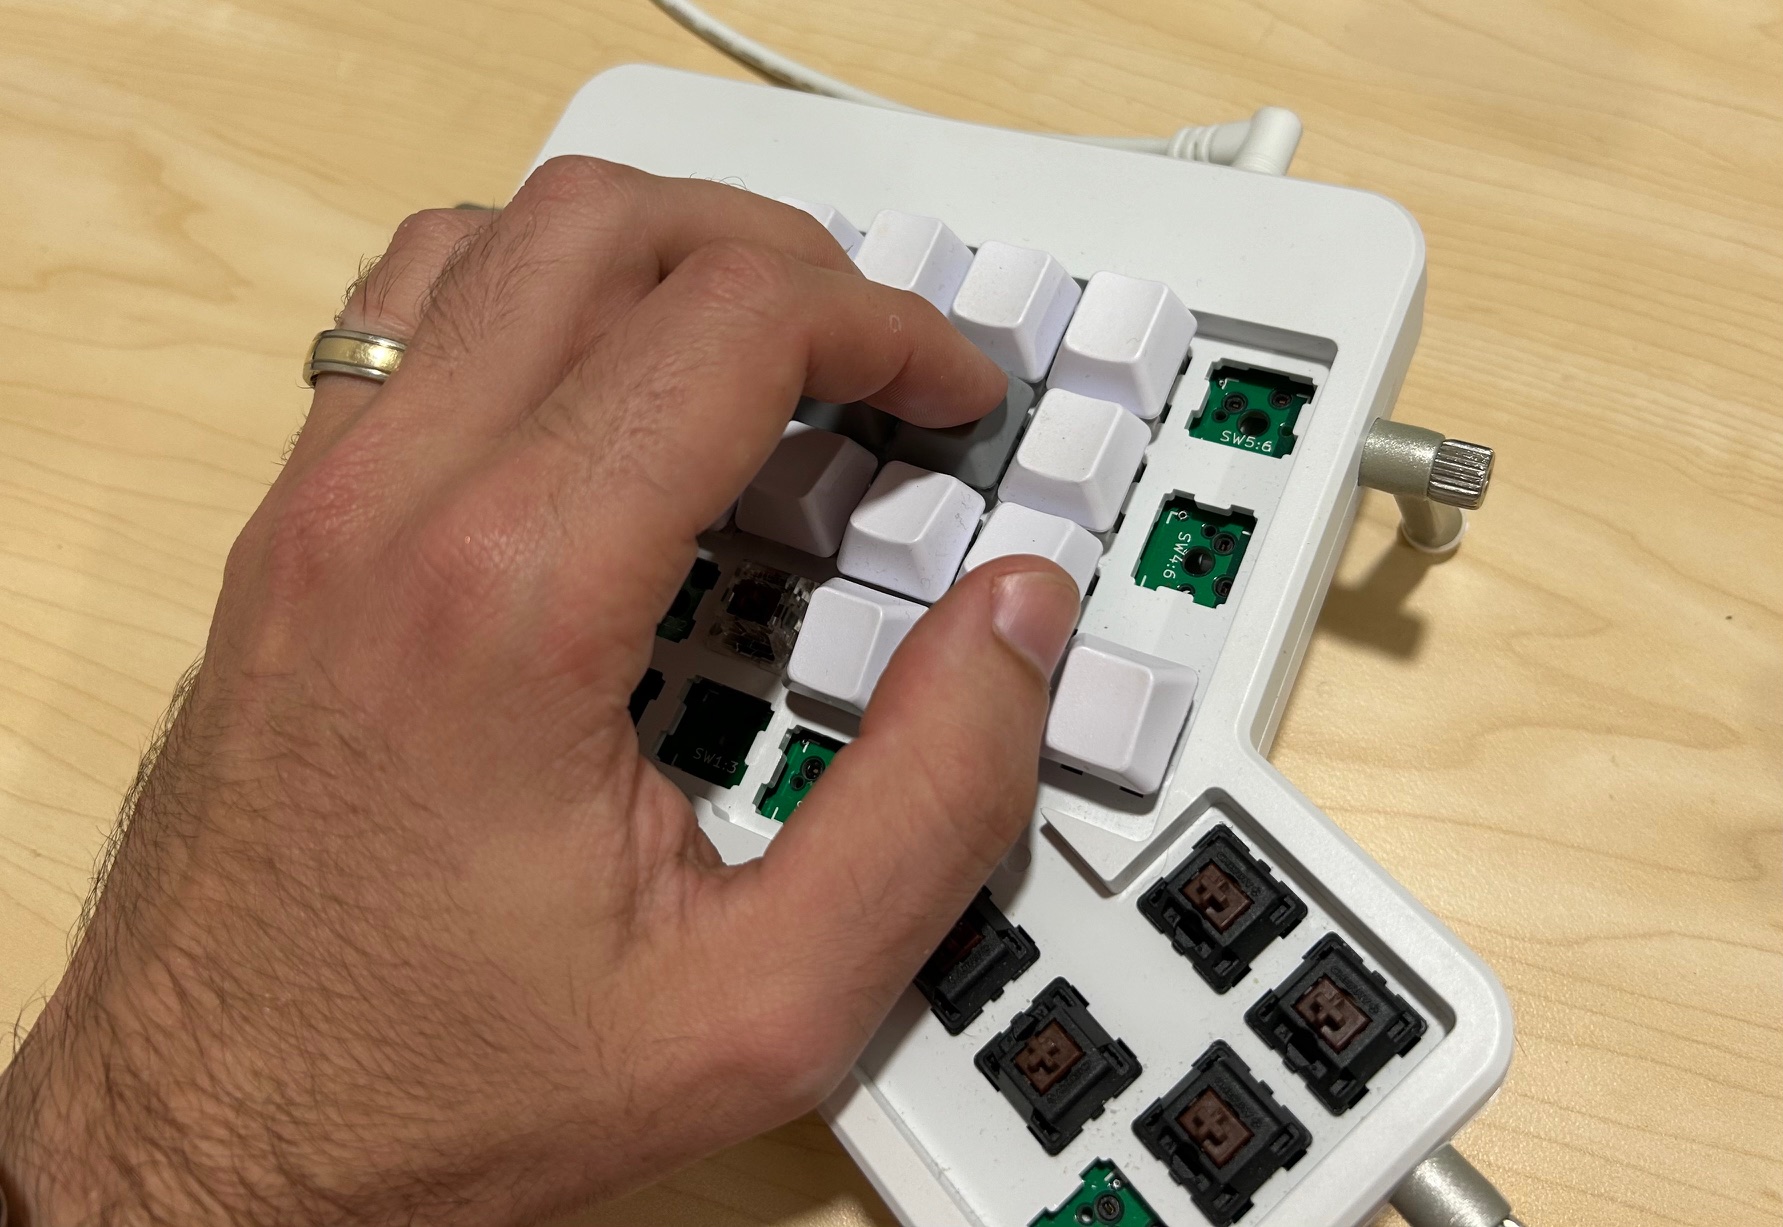
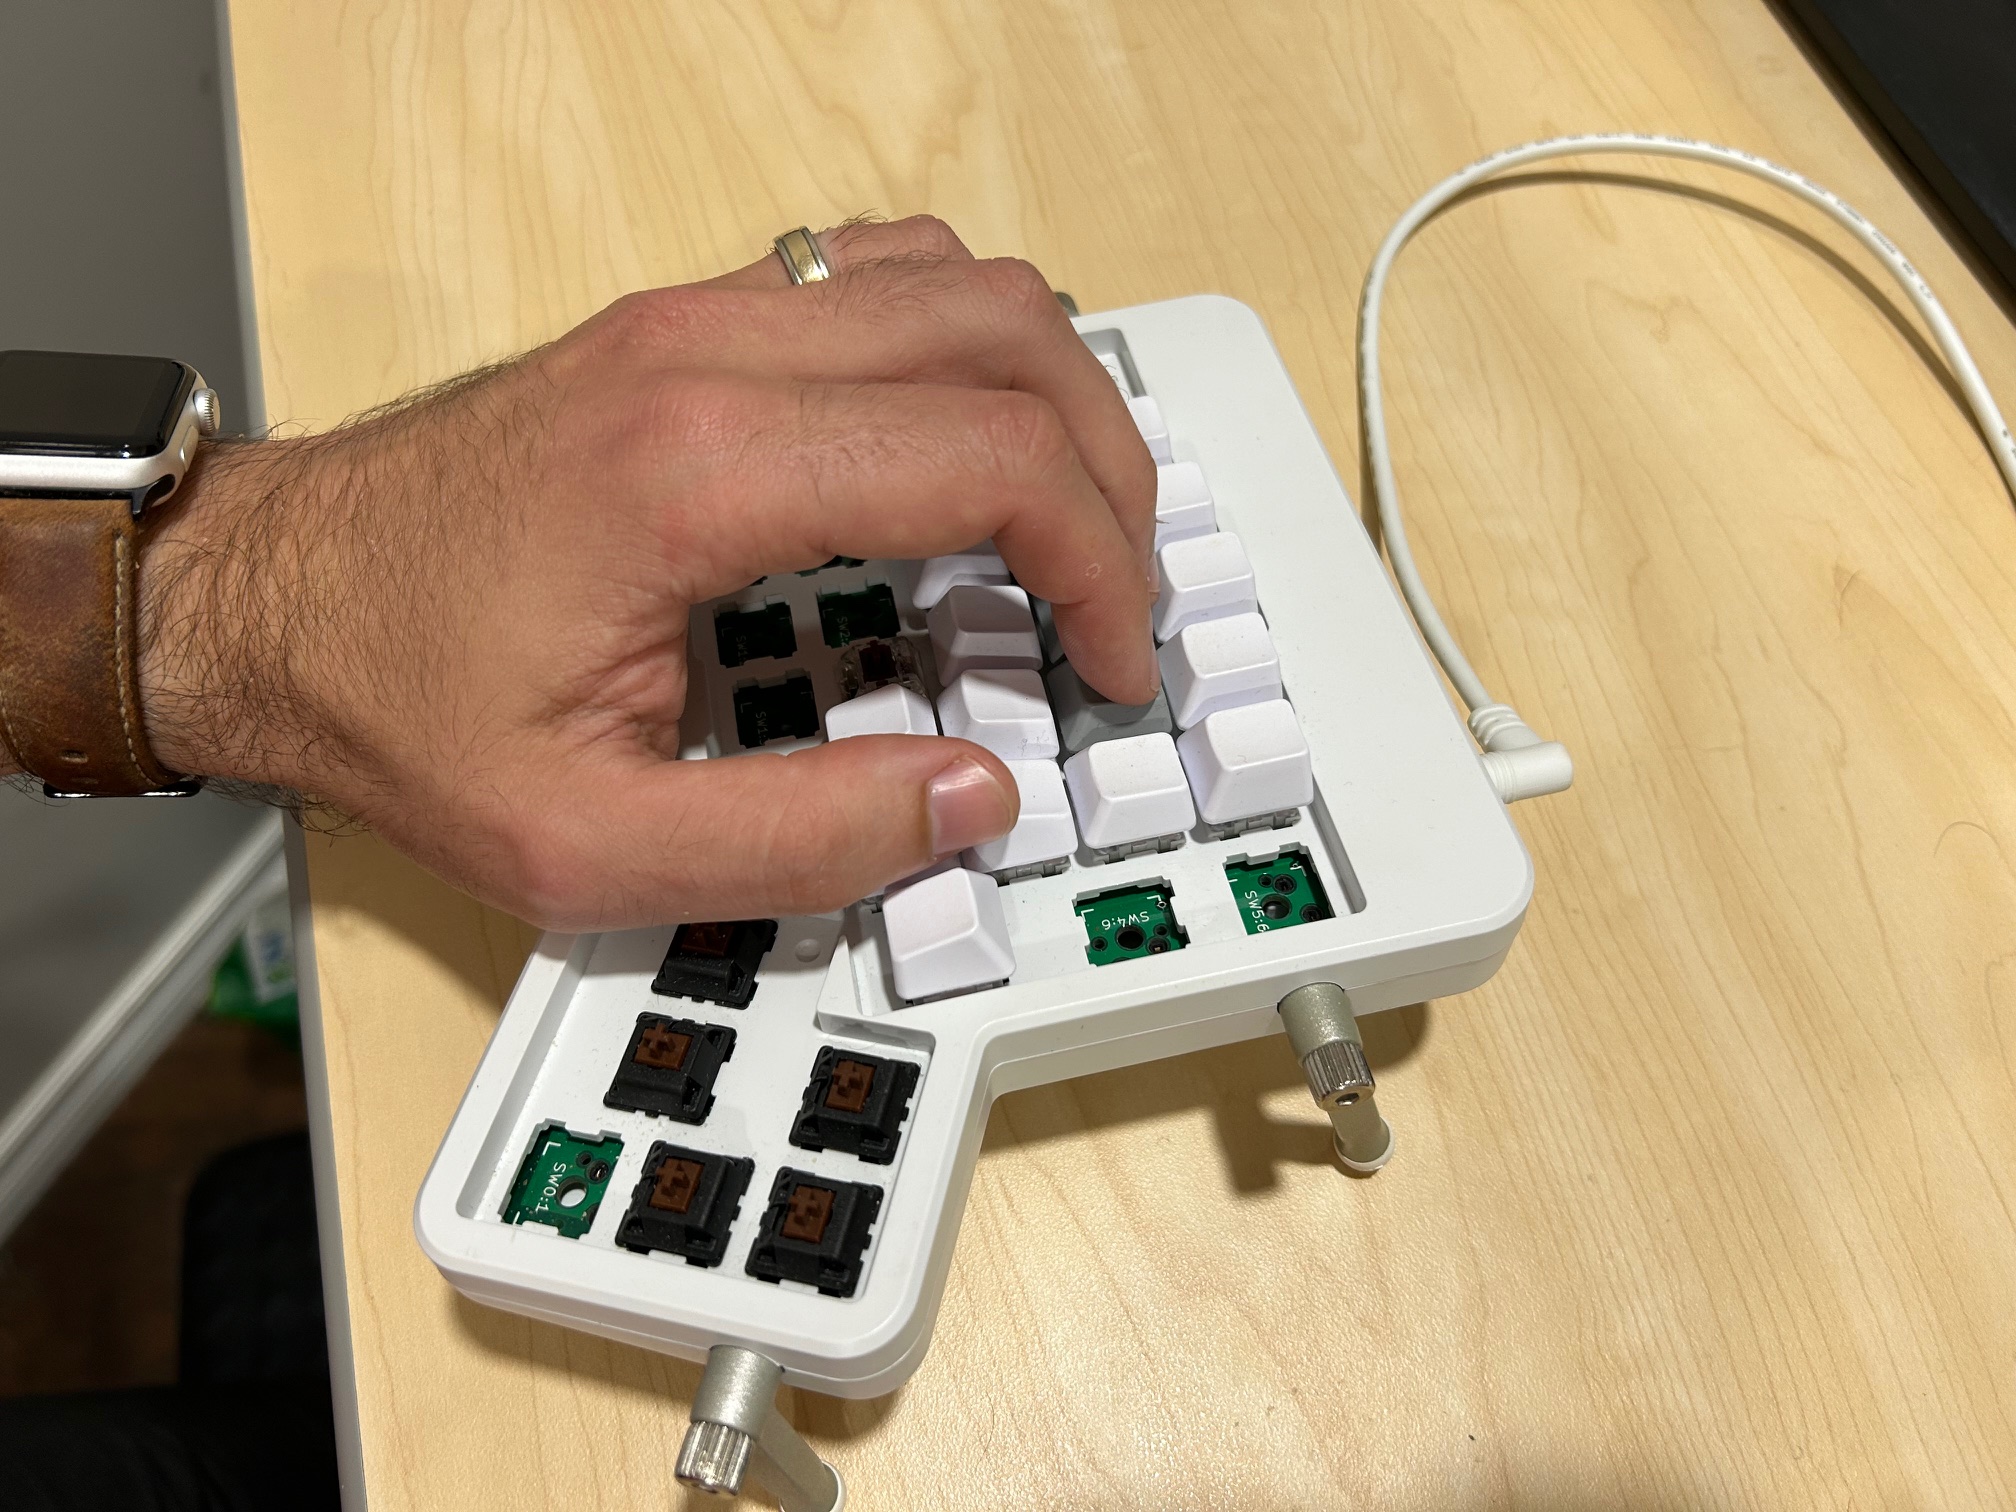
But, here is the cool part. We can shift all of the keys up by one, and then move the thumb keys towards the middle by one. We can also physically remove the unused keys from the board so they don’t get in the way. This results in a very comfortable hand position. No more claw. You can easily reach every key without contortions.
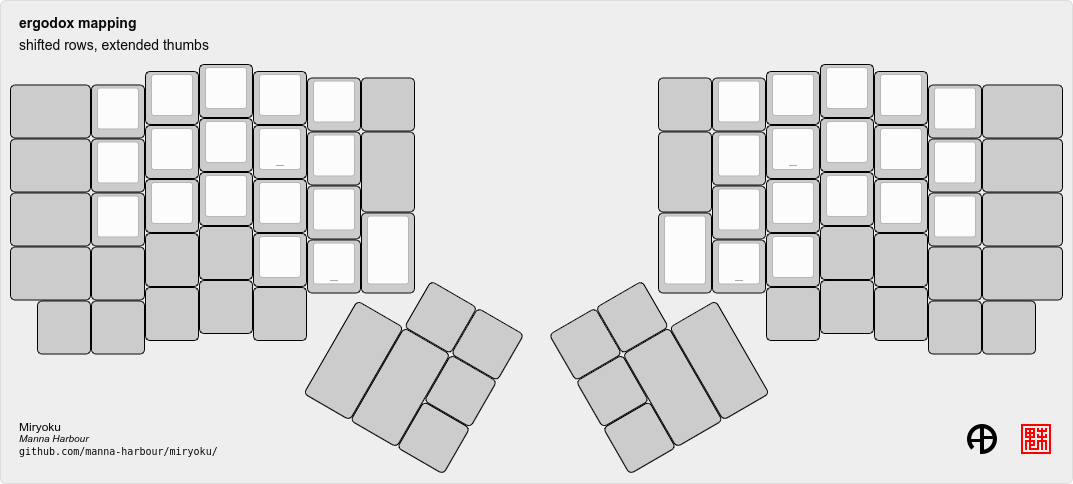
This is an available configuration in Miryoku: shifted rows + extended thumbs. Even if you aren’t into Miryoku, this pattern can be easily recreated, and adapted to your needs.
This article was first published on June 23, 2023. As you can see, there are no comments. I invite you to email me with your comments, criticisms, and other suggestions. Even better, write your own article as a response. Blogging is awesome.